Overview
This is a private job, where I have been asked by the client to keep their information private. However they are okay for me to share some parts of the design. They are an Indian couple, living in a suburb of London, in a nice large house with a medium sized London garden. They wanted to become more self sufficient, and make good use of their garden.
Working with a client
I met the client at a free event where I was showing one of my designs. The clinet approached me after to do something similar for their garden. I was rather reticent at first, as I preferred to do community jobs than private jobs. However they bribed me with some Indian home cooking and agreed to pay for me to come for the evening just to discuss the idea. So I went and looked at the site and conducted a basic interview. During the discussion they convinced me this would be a good example for the Asian community and that they would make sure plenty of people would be inspired by this garden, and the deall clincher was, that they would keep feeding me with their wonderful home cooking. So how could I refuse to take on this job.
The following day I gave them my proposal by email
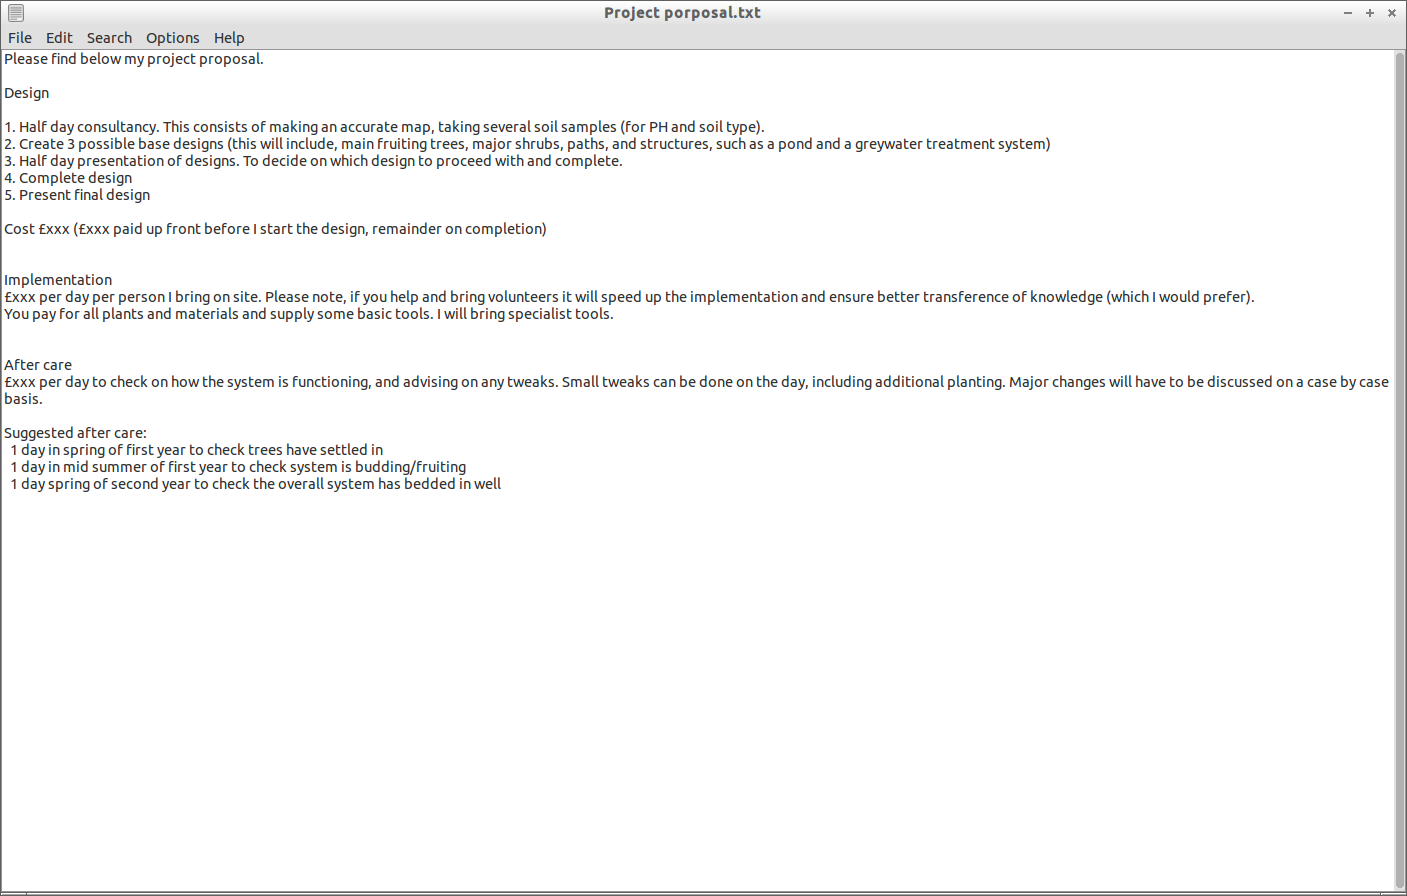
The clinet agreed to the terms and so I set to work
Choosing a methodology
They wanted a simple low maintenance forest garden designed, so I chose to use my forest garden design methodology "Raks Forest Garden Design Methodology". I would like to give it a fancy name or any acronym, but being clever with words is not my strong point (if someone would like to offer any help, please do email me).
The parts of the design are as follows
- Collect info
- Evaluate
- Make a map
- Canopy
- Understory
- Water
- Paths
- Nutrients
- Adjust trees shrubs and paths to accommodate nutrient requirements
- Shrubs
- Complete paths
- Identify uses for sections
- Design guilds to include herbaceous, climbers,creepers and root layers
- Implement
- Manage
Now if we tried to make into an acronym from this it would be "CEMCUWPNASCIDIM".... yeah right!!!! I think we can discount that idea! Lets stick to Raks Forest Garden design methodology" for now.
Working through the methodology
Collect info
Clients wants
- As much food as possible
- No fixed ideas as they have no idea what can and what cannot grow here
- Unusual or expensive things which would save them money and could be used to swap
- They asked me to recommend whatever I think would be appropriate
- They have a green chair that they made from wood and grass, whcih they would like to keep
- They like the idea of treating their own greywater and having a pond
- They liked my suggestions of a mix of herbs, medicines, fruits as well as green leaves, roots, salads, etc
- They had no idea the one tree they had was a magnolia, so I suggested we keep it, but they were not bothered either way.
Maps
I was given some rough maps which they drew up before I arrived. I later checked these measurements and made a google sketchup map of the place


Soil sample
I took some soil samples from various places


Wind statistics
I found some statistics for the prevailing wind. The client had no idea, so I went to the local park and spoke to the park keeper to confirm the general pattern was correct


Evaluate
The site is very sunny, apart from directly in front of the shed. The only plant in the place is a magnolia tree and an apple tree that hangs over from next door. The soil is silty clay, so needs organic matter and the pH is reasonable. Given the open scope of this project I drew up some categories of plants and made a suggested plant list accordingly. This is roughly the list I recommended (this is the polished version, which came later in the design).
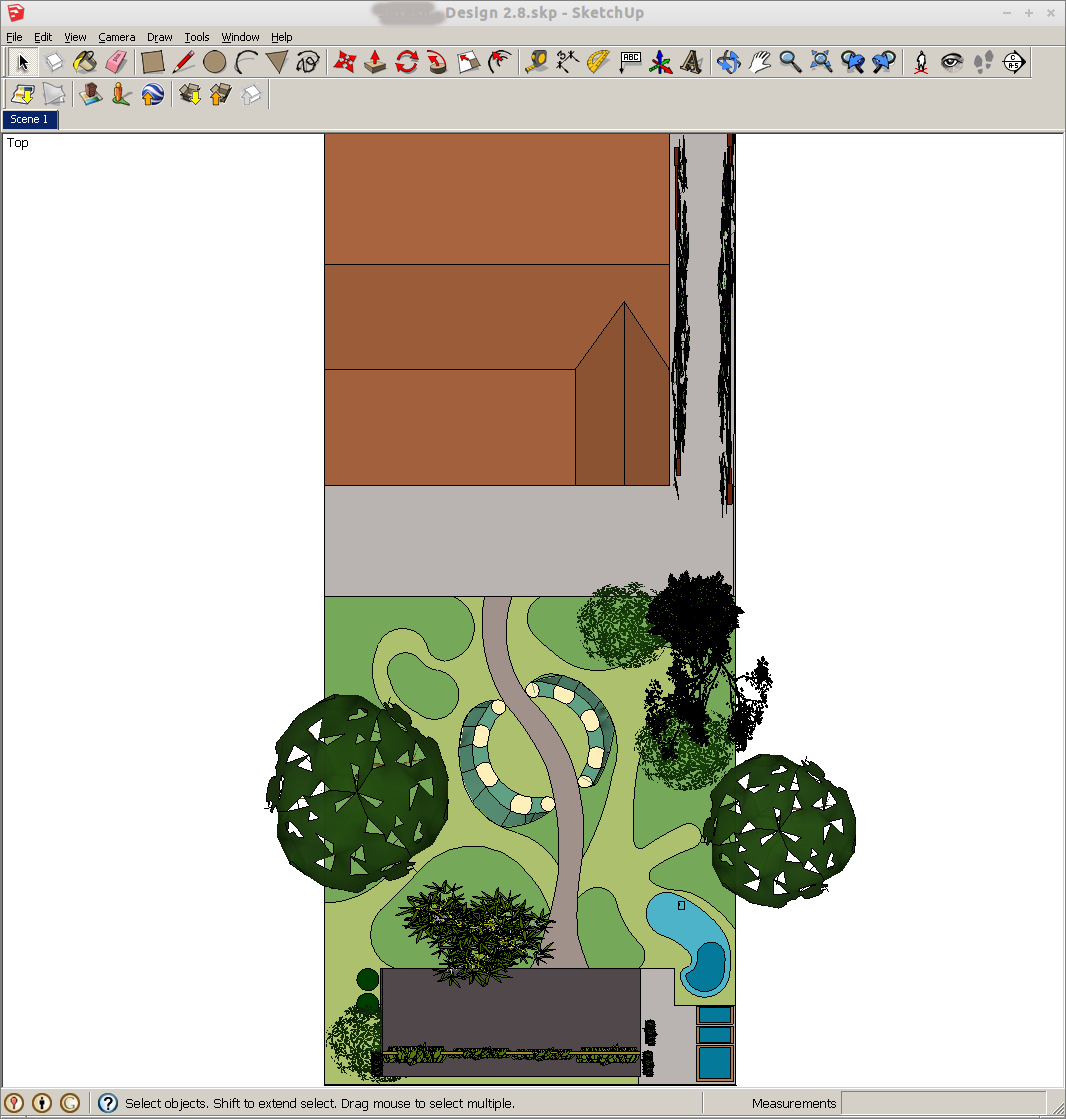
Zones
As you can see I made the zones map on top of the final plan. Thoug in the real design I identified the zones long before. And identified it on the sketchup designs (which is not as nice to look at, hence including the more pretty zone map with the rough planting design underneath).


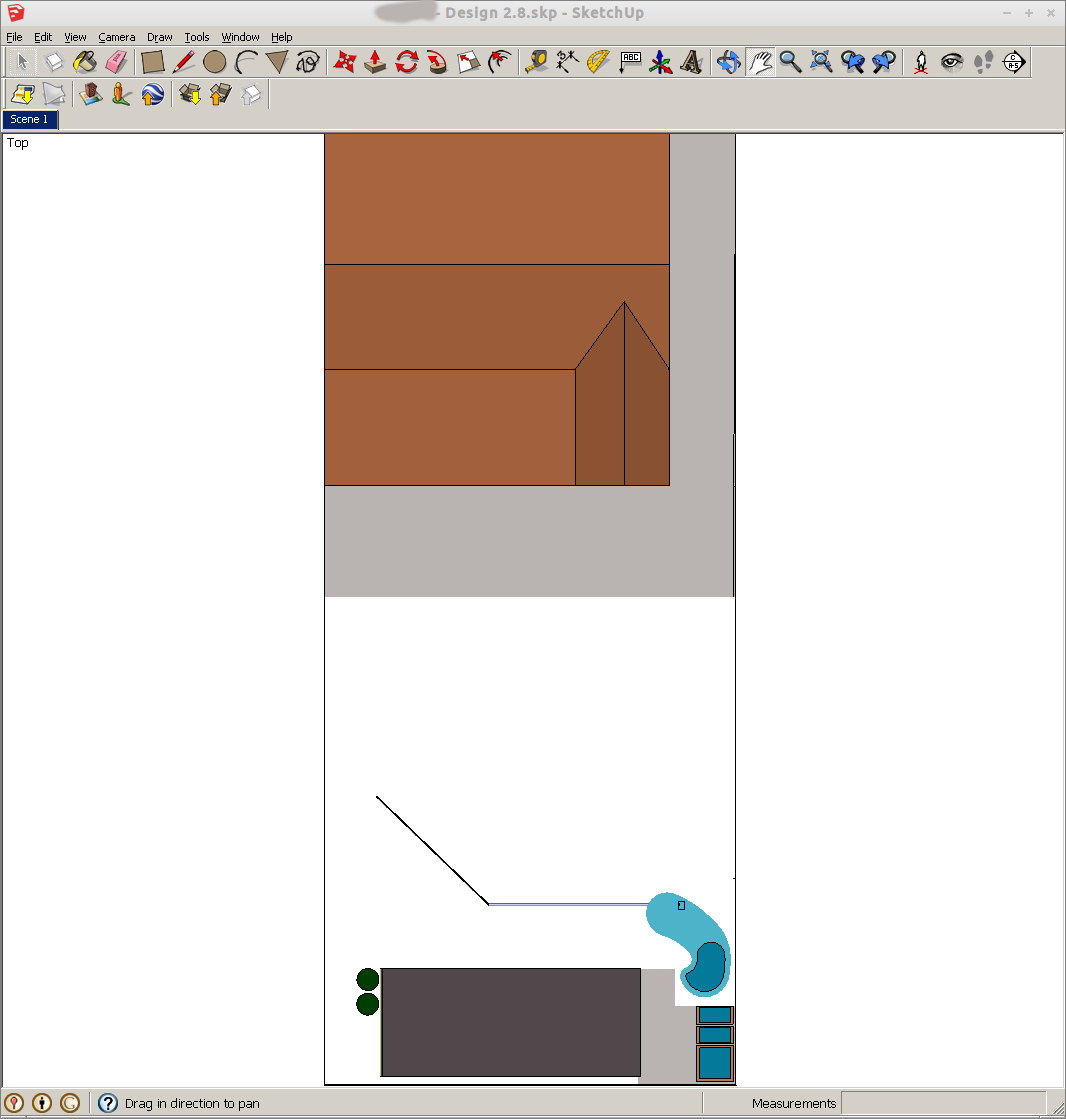
Make a map
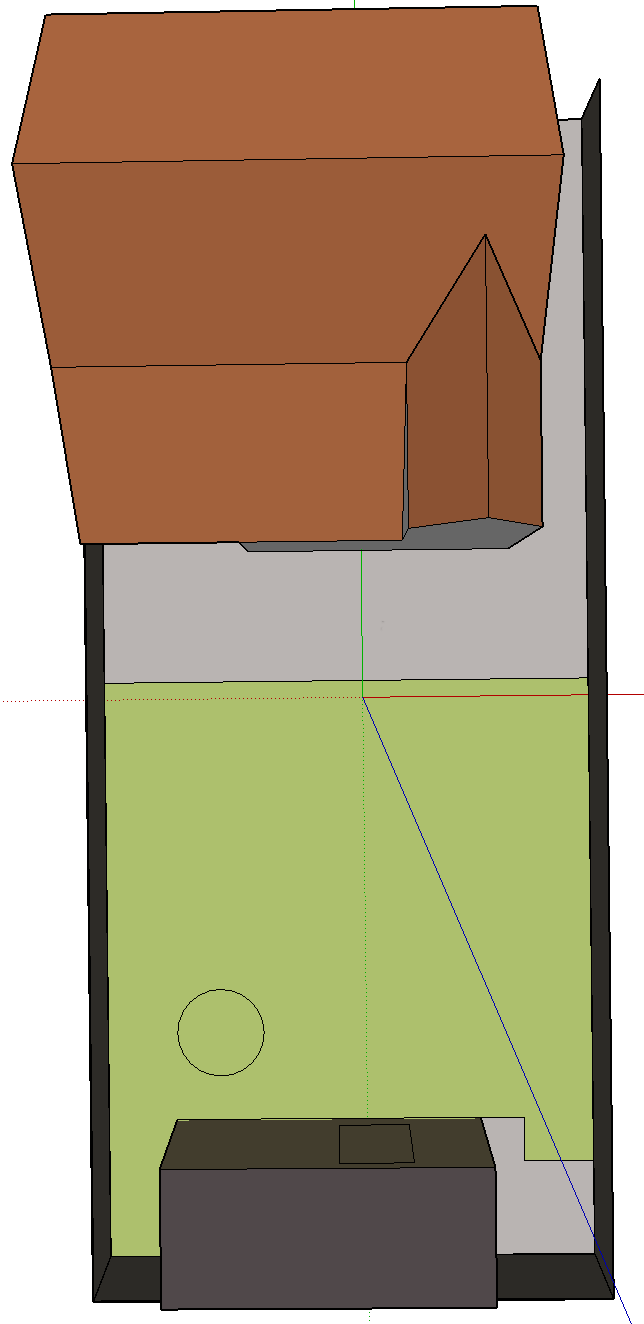
Canopy, Understory and structures
The following pictures do not accurately describe the actual process, but they do show wher esome of the elements are finally placed. The real process is to list all possible canopy and understory trees as well as any structures. The structures are run through the permaculture principles to evolve them, and the trees are discussed and I move them around until they are in the best position to ensure they thrive, i.e. they all get the amount of light, soil type, etc.
Here are some of the Canopy and undserstory trees and a few shrubs
Here I have added some of the structures. The most interesting invention being a seated area which is the focal point of the design, which has a half hugle sloping around each side. This is a design I have since used severl times in different places, but this was the place where I invented this construction. This came about from the idea of wanting to give them a place they could sit and meet friends, which doubles up as a food growing space. By placing aromatic plants at the top (which happens to be the dryest place, and therefore we can put in medeteranian herbs), we make the place aromatic as well as a plac you can sit while collecting herbs.
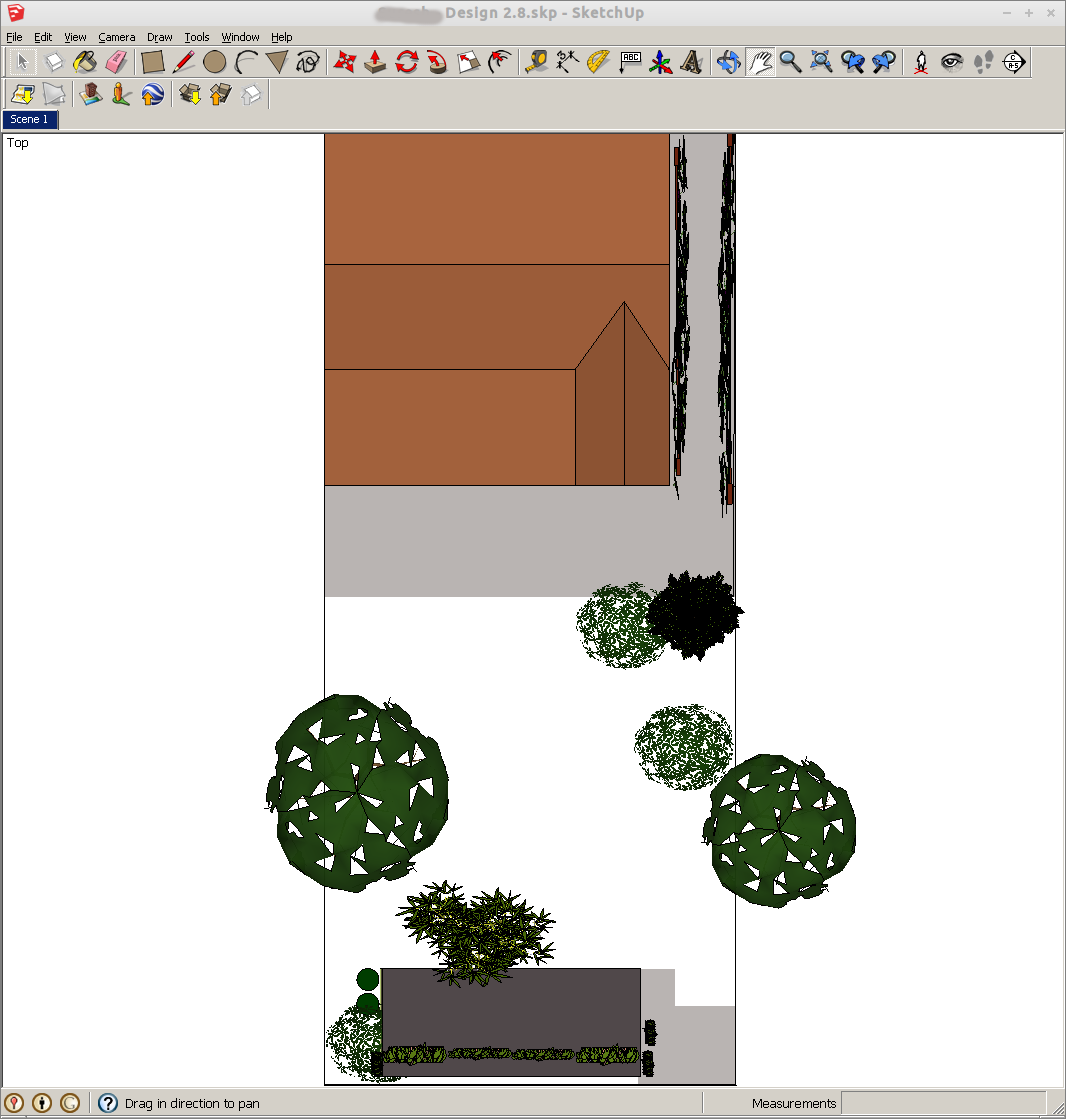
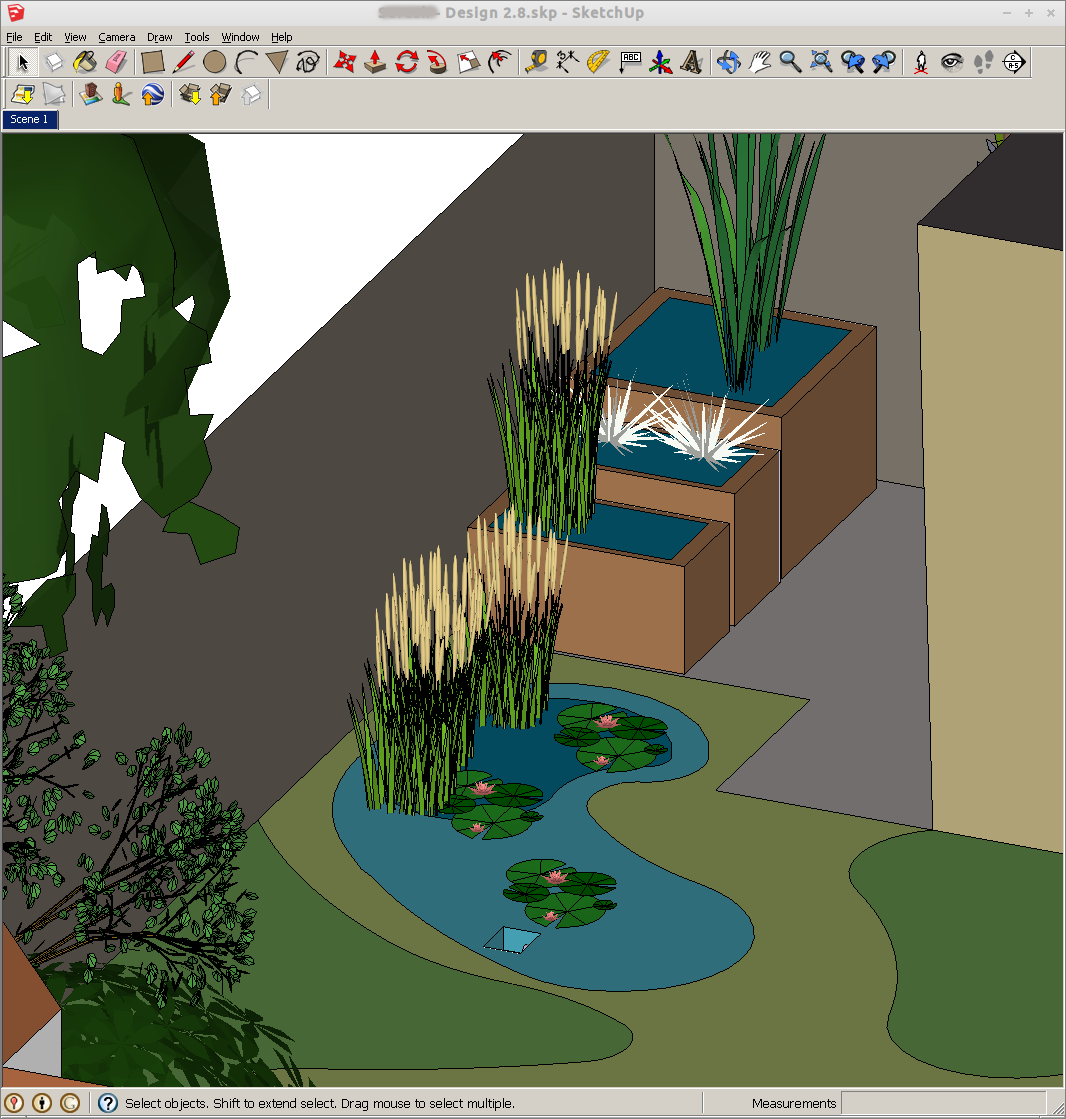
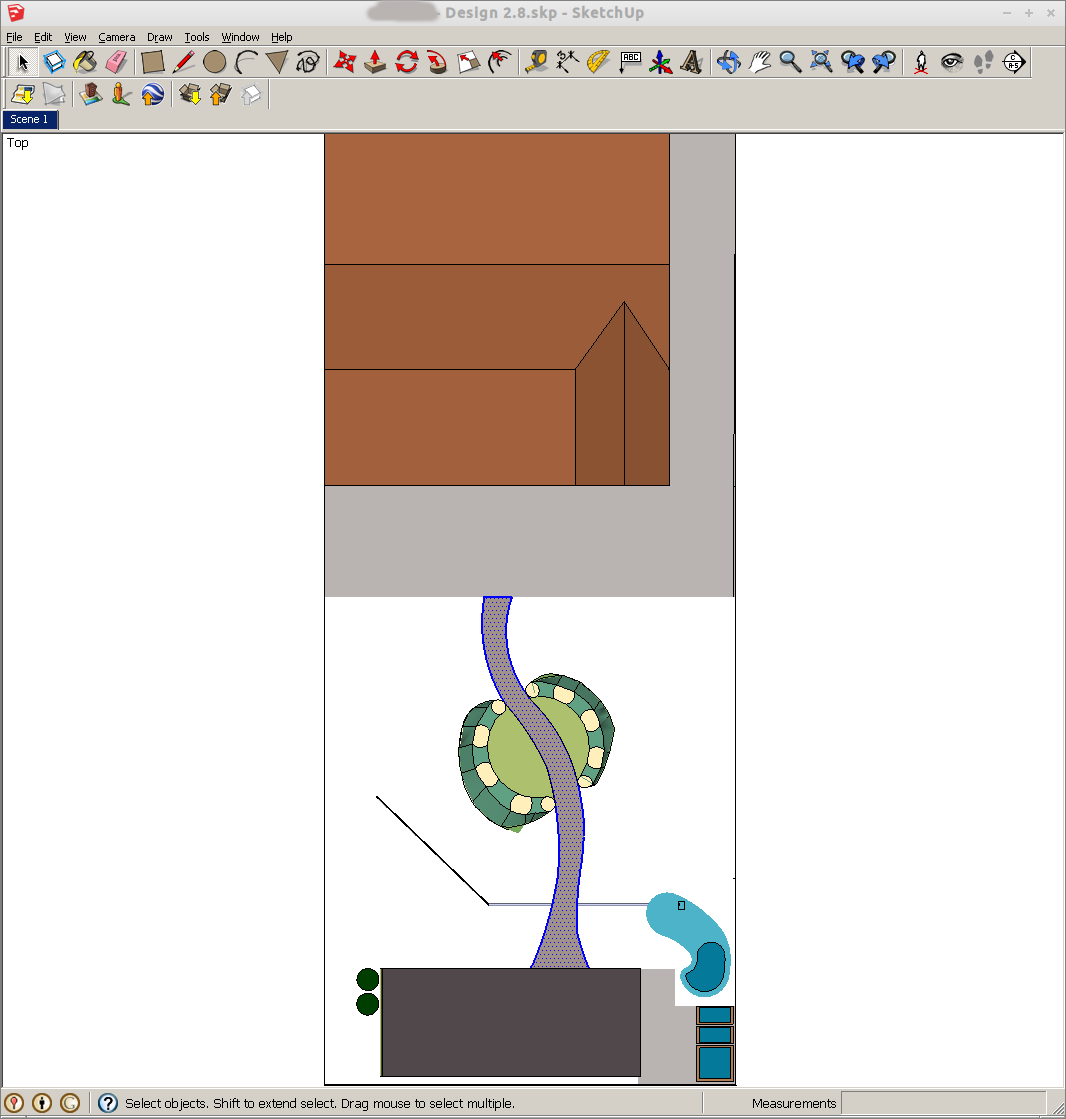
Water
Given I had already made a similar design, i saw no need to reevaluate this. So I took an existing pattern and adjusted the detail. The water for the garden comes from shower greywater. It comes from a shower which is on the first floor on the east side of the building. We installed a switcher junction so we can adjust where the water goes to. Then took the T-pipe and ran it to the greywater treatment system at the back of the garden. We chose to put it there as garden slightly slopes back to the house, which means any overspil can soak back into the garden. The output from the greywater system then enters the pond, which during the implementation we intentionally modified to take a full round through stones (maximising edge) before entering the deep part of the pond. Water from there then overspills to create a bog. There is also an extra overspil which takes water and soaks it deep into the soil accross the garden.
Here you can
Paths
With the key elements in place, inlcuing the structures, canopy and understory layers, the paths are then added to most efficiently carry people to each area.
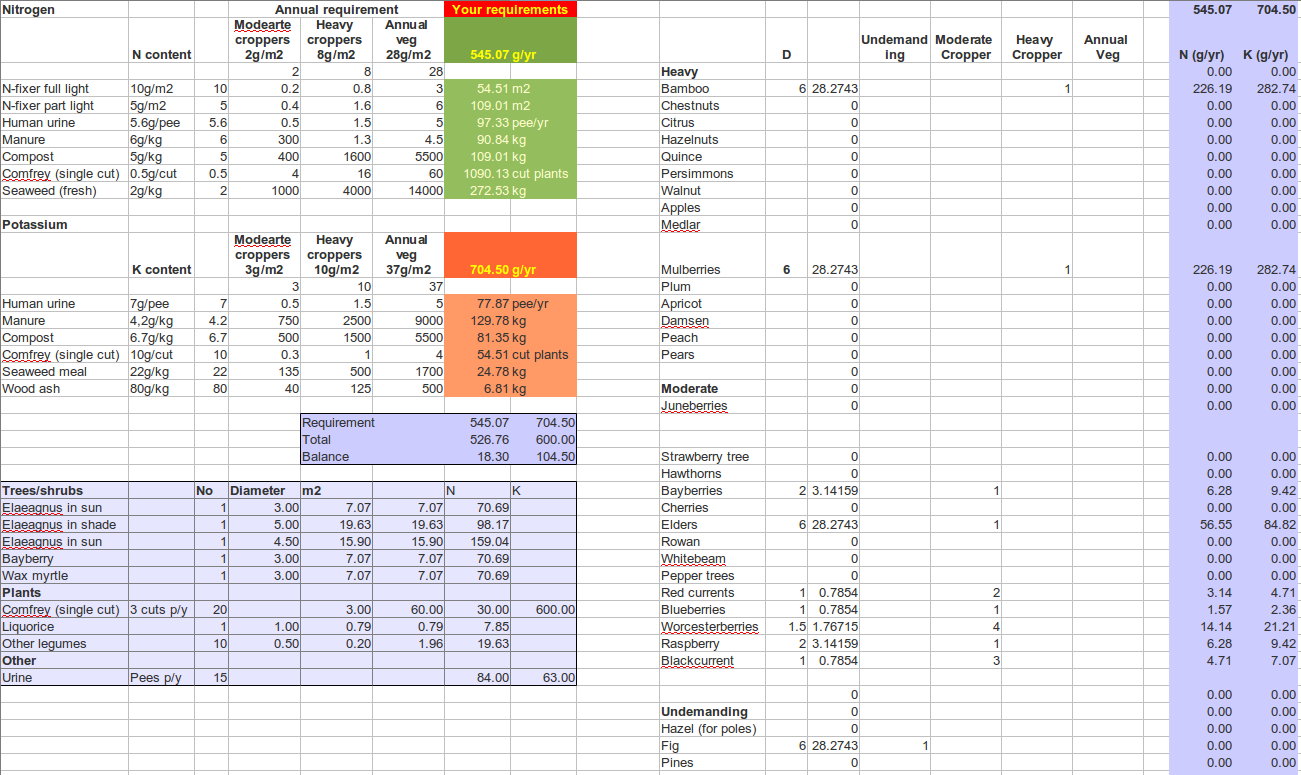
Nutrients
Now that we know all the major plants, we cancluate the nutrients needed to keep all plants happy all year.
Adjust trees shrubs and paths to accommodate nutrient requirements
Now that I know all the elements for this place, I can play with where they all go. At this point I looked at creating 3 scenarios for the client, though I must admit I cannot find the two other scenarios (I have a feeling they were on paper, which is now lost). The other scenarios were taking into consideration their desire to keep the green chair they built, and one scenario which was a hlaf way house between my preferred design and sticking to their specification. In the end they chose my design, which is why I have it in sketchup.
Shrubs
While adding the shrubs to the design I do so taking into consideration the nutrient requirements. Often at this stage some of the trees need to be taken out to make room for the necessary nutrient fixing trees and shrubs. Where possible I use shrubs, especially on borders.
Complete paths
Having adjusted the shrubs and trees I can now finalise the paths. This then starts to clarly define regions in the landscape, i.e. distinct areas with clear borders, which I can then evolve in the next step.
Identify uses for sections
Havng now found some clear areas in the design, I now start to identify what each space will evolve into and how it will be used. I can then set about making guilds as the final stage of the planting plan.
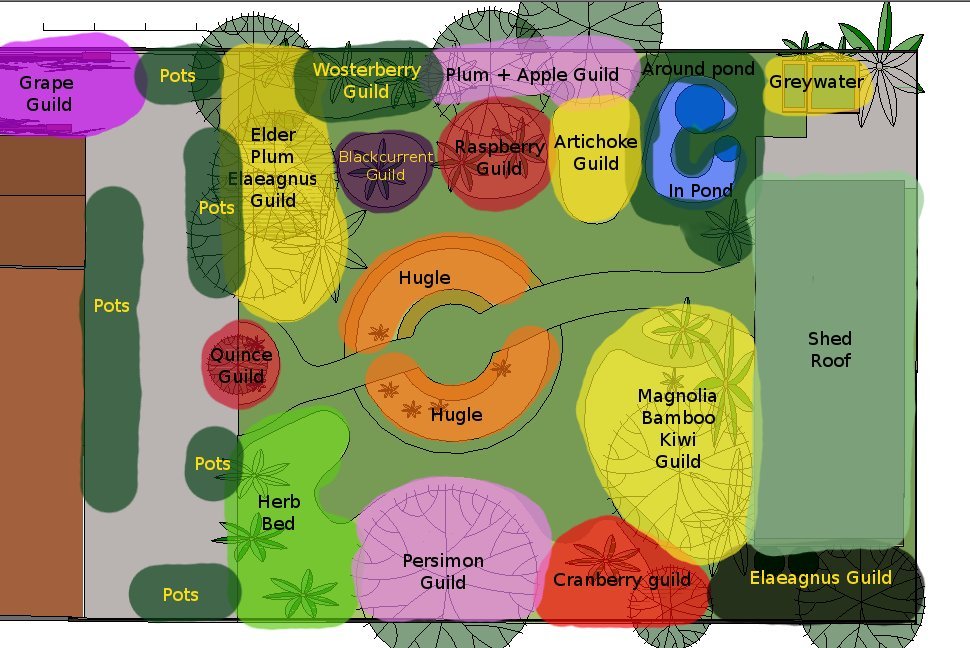
Design guilds to include herbaceous, climbers,creepers and root layers
This is the final part of the design. We now have a nice clear patternn of what happens in each areas that we have created. So now we can finish off the detail and make plant guilds (plants that help each other), for each section.
Implement
Once the three designs were completed I showed them to the client.
1. Clients will
2. My design
3. Combination of mine and their ideas
Client chose my design
We then agreed a strategy and chose the dates we would start the work and we began. I insited the client got involed in the implementation so that they could have a good idea of what is going where and start making a connection to their new garden.
I only managed to get a few pics of the implementation which are acceptable to show (given the client wants to remain anonamous)


Manage
Summary
Half way through the implementation the couple filed for bankrupcy, so I was unable to complete it in the way I wanted. I did however continue to work there for free just to fulfil my duty to nature and create a haven we were aiming to create. Regarding the methodology, I realise this works much better in practice, than it does on paper. This is the first time I have tried to write up this process, and given that it is not a linear process, I really struggled to capture this process in a linear form of documentation. I have designed many forest gardens using this methodology and it works very smothly. I also teach this and my students also agree it is simple, logical and effective. I will give it some thought to see how I am improve it and make the written form more closely match the documented form. Perhaps the next design I make I will document as I go, rather than as in this case trying to adjust the info I collected for the client and make it fit a design documentation.