Overview
Like most front gardens in suburbia, this front garden was paved over to allow cars to park (back in the day when we used to have 2 or more cars). Now that no one owns a car in the house it would be great to bring some colour and life back to the garden. It would also be good to share with the neighbours as there is not much community spirit in this street (unlike back in the 70's when we knew almost everyone).
Choosing a methodology
The majority of my designs utilise the SADIM methodology, which I find flexible and robust enough for any job. But occasionally I like to challenge myself and get out of my comfort zone. So having struggled with OBERDIM before, I thought I would have another go and see if I can make the methodology work.
Working through the methodology
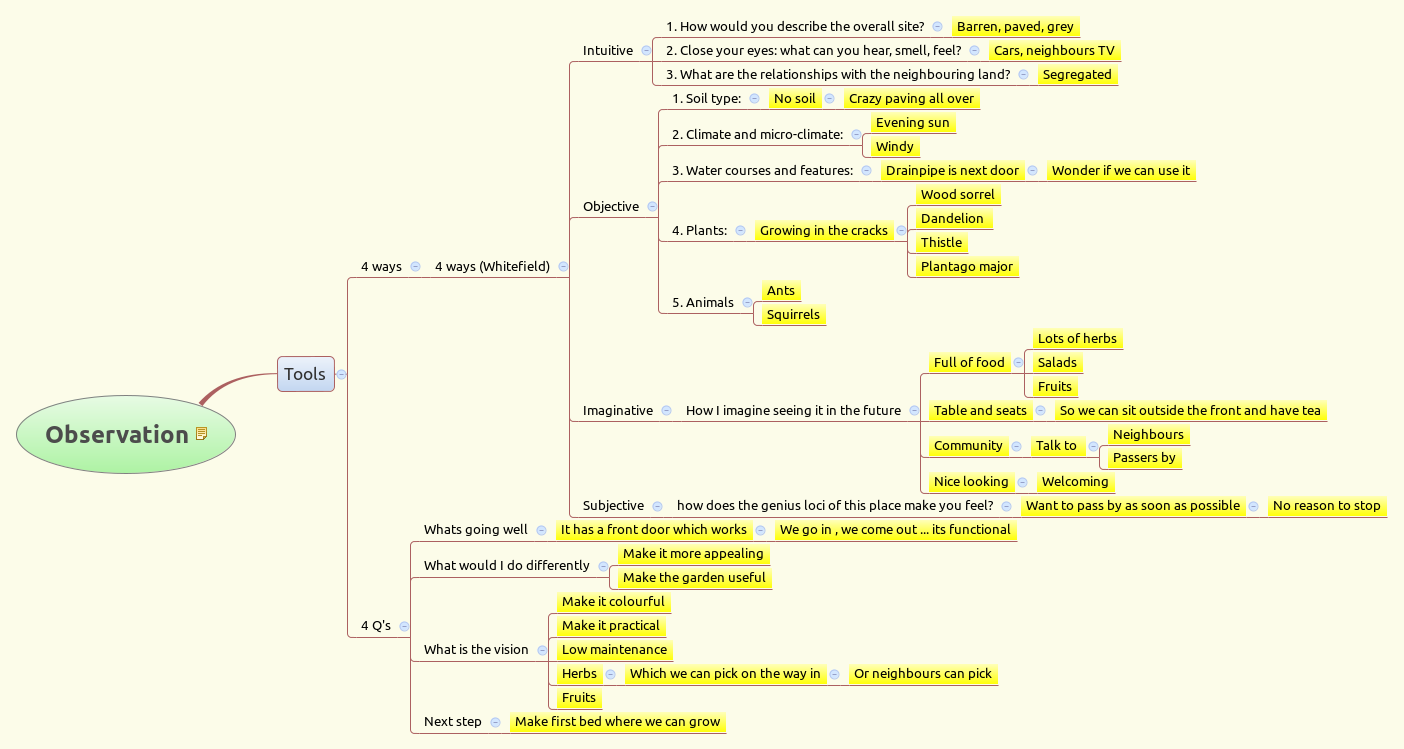
Observation
Key points from the observation are how lifeless the site currently is. It is also exposed to wind and only post midday sun.
This map shows the real orientation of the site
All other maps are drawn without true north represented as they are more for visual representation
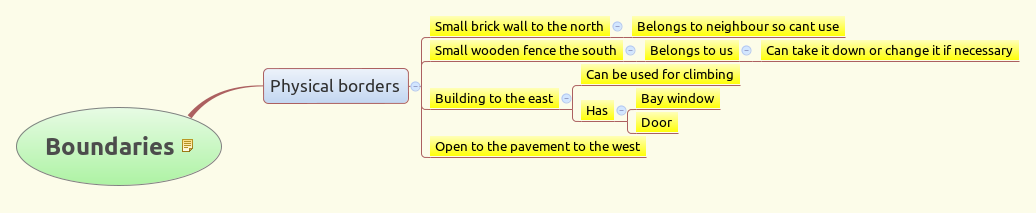
Boundaries
The most interesting boundaries are the front to the pavement, which is the edge between this garden and the outside world. It is here that we can potentially exchange with the neighbours. We also have some walls which could be used for climbers.
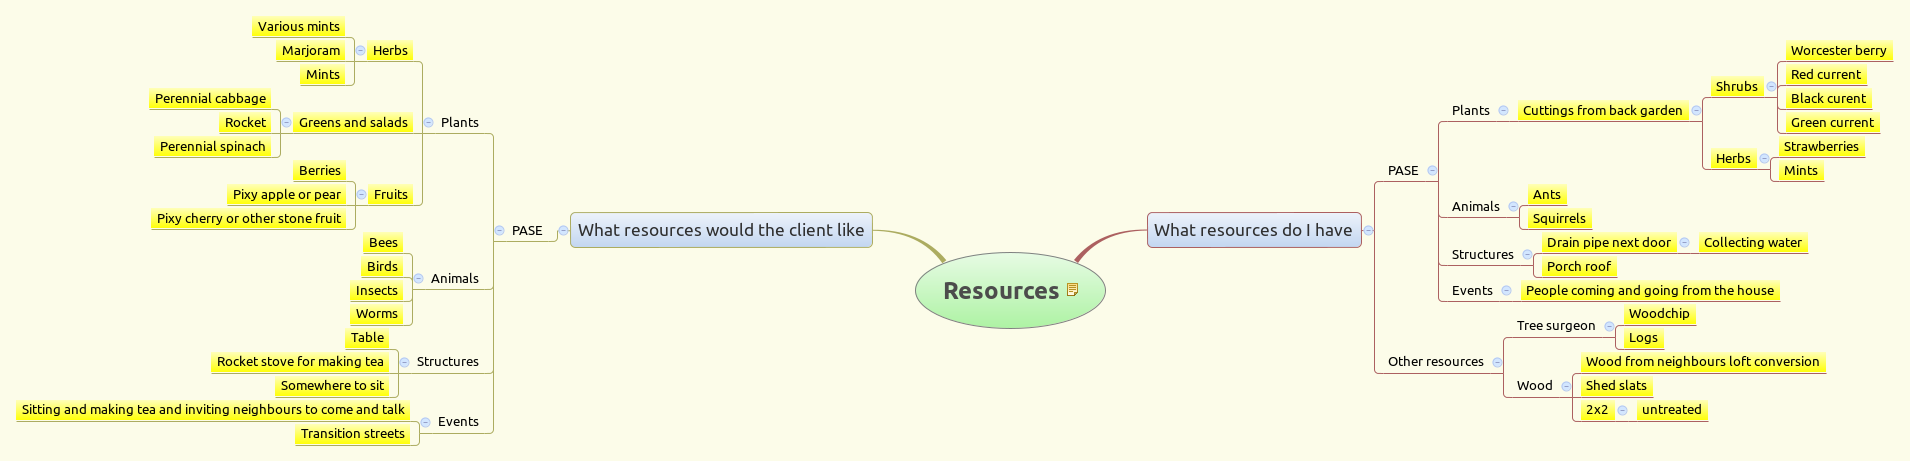
Resources
Lots of possibilities regarding building materials, main issue will be how to make it look nice.
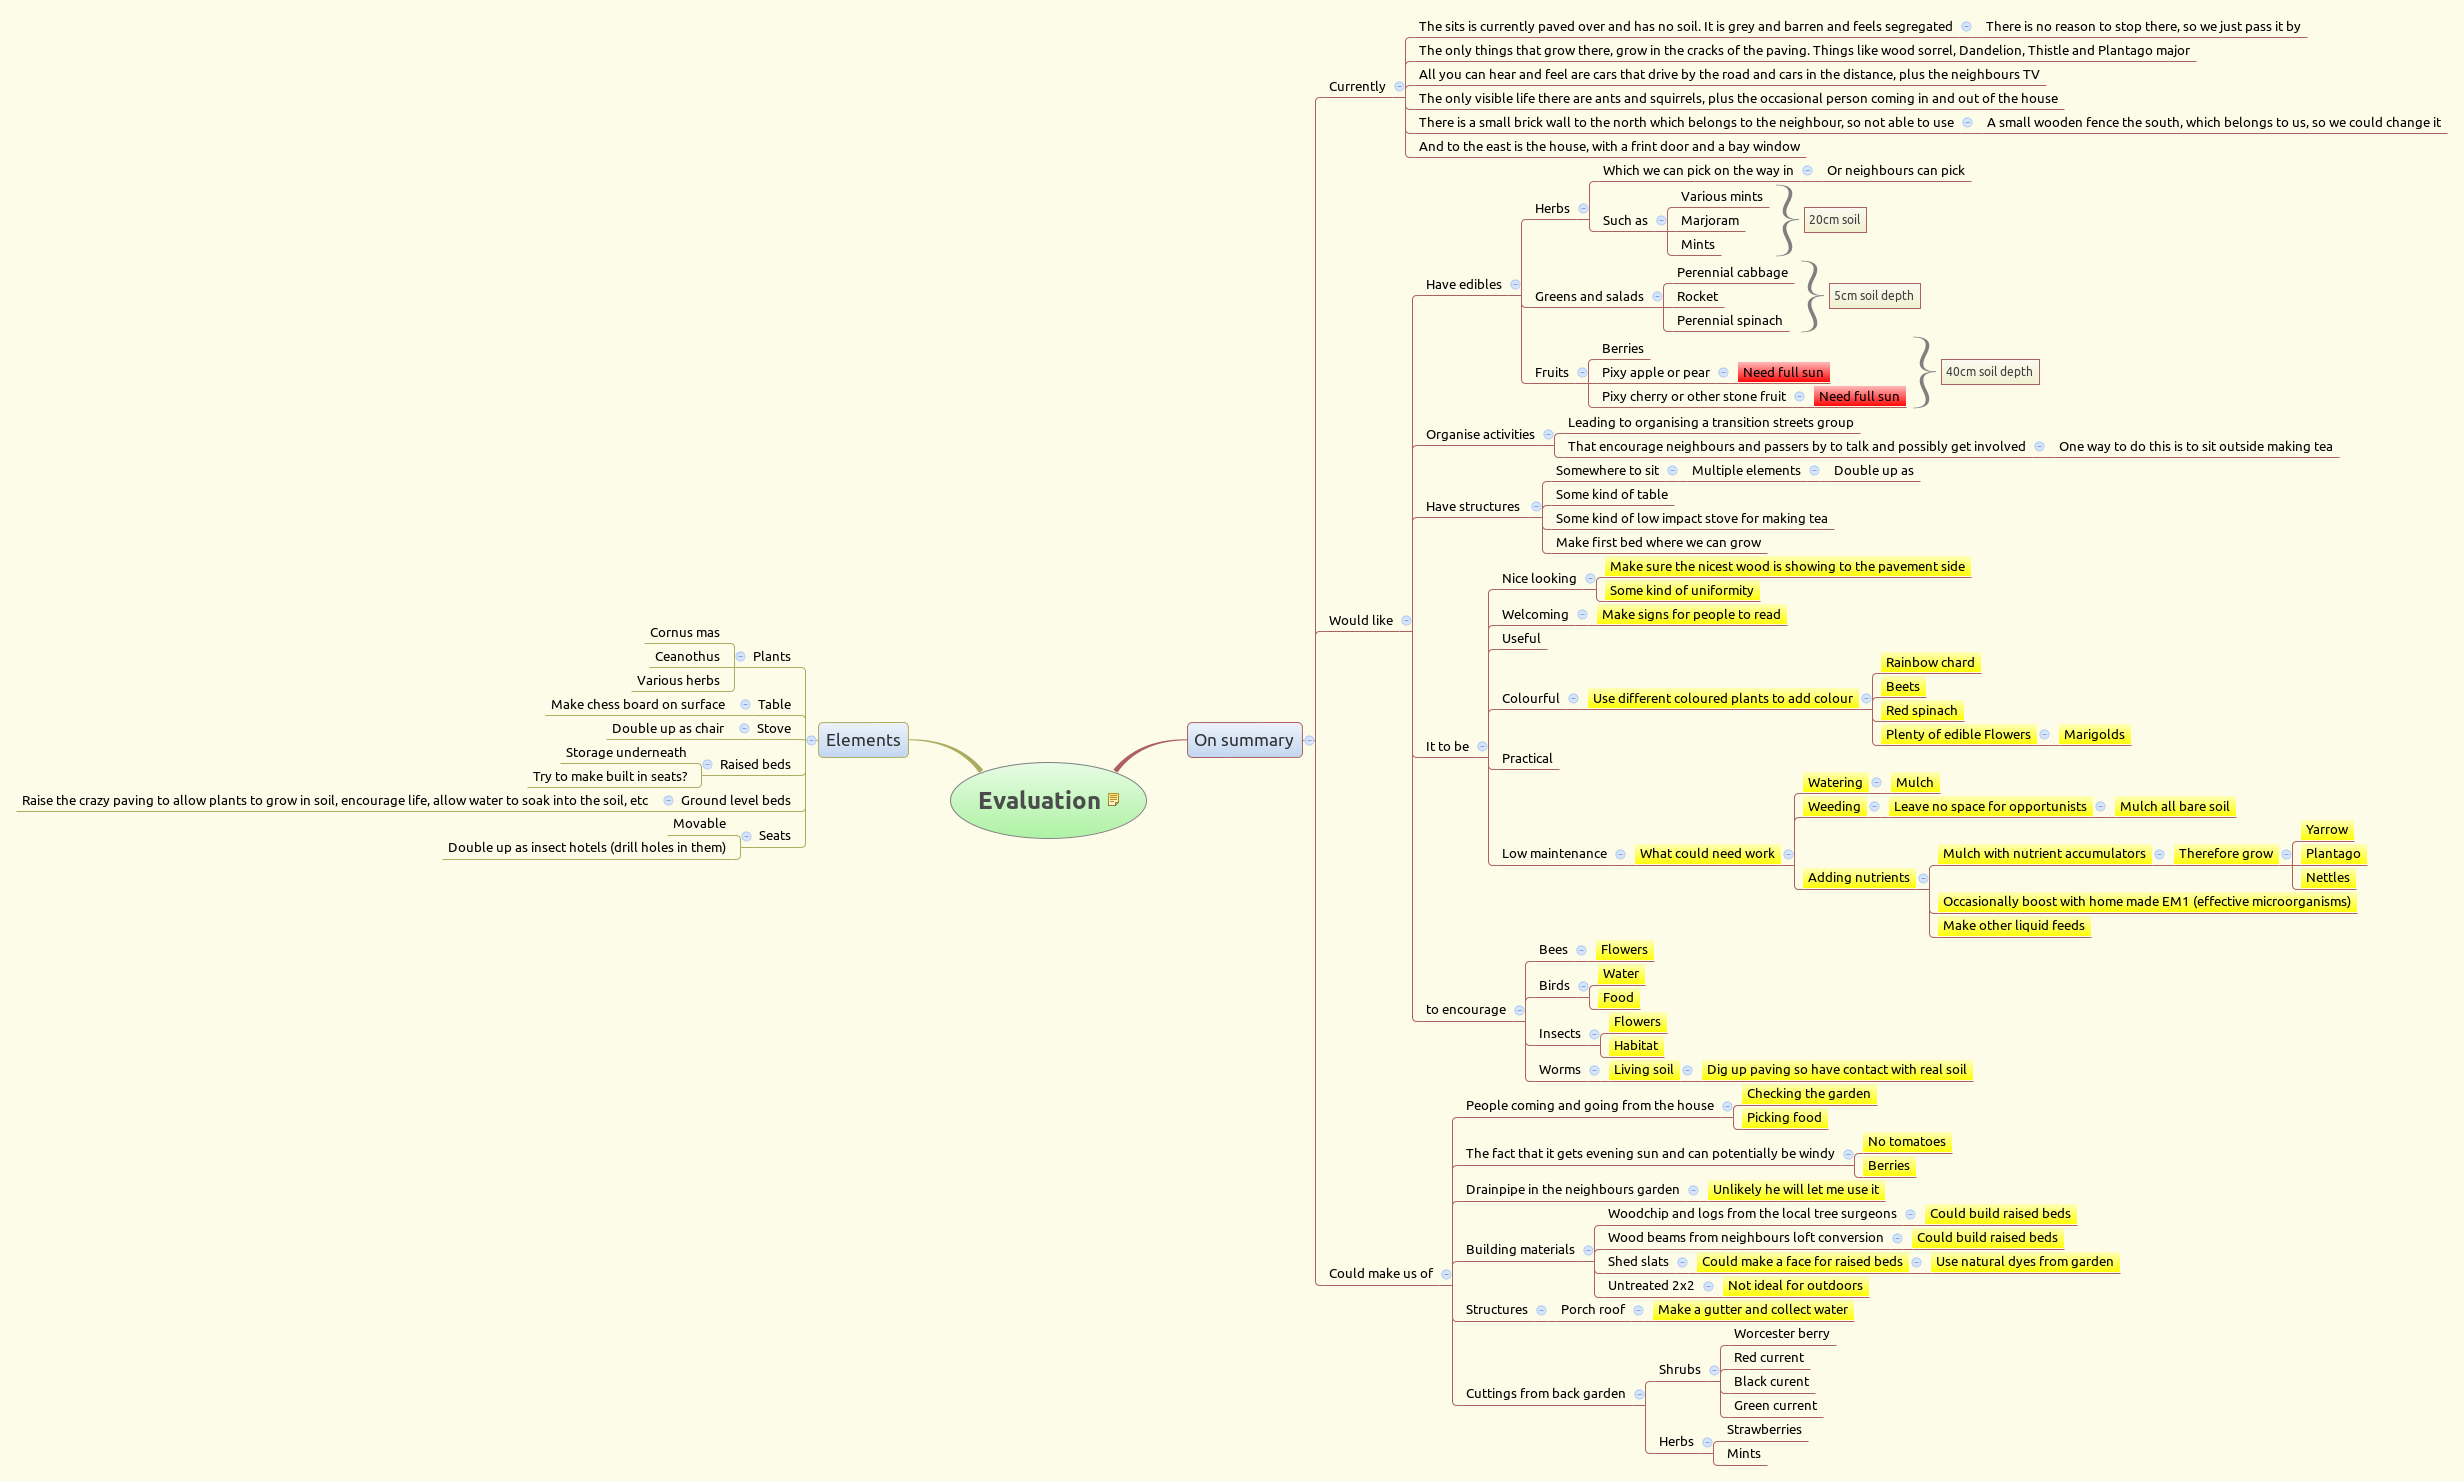
Evaluation
Evaluating the information gathered made me realise some plants will not thrive here, so I had to eliminate them. The need for a nutrient strategy also arose.
Wind statistics
The wind statistics show us that this site is quite exposed to wind.


Zone analysis
Being such a small site, zone 1 and 2 are all that we can fit in here.


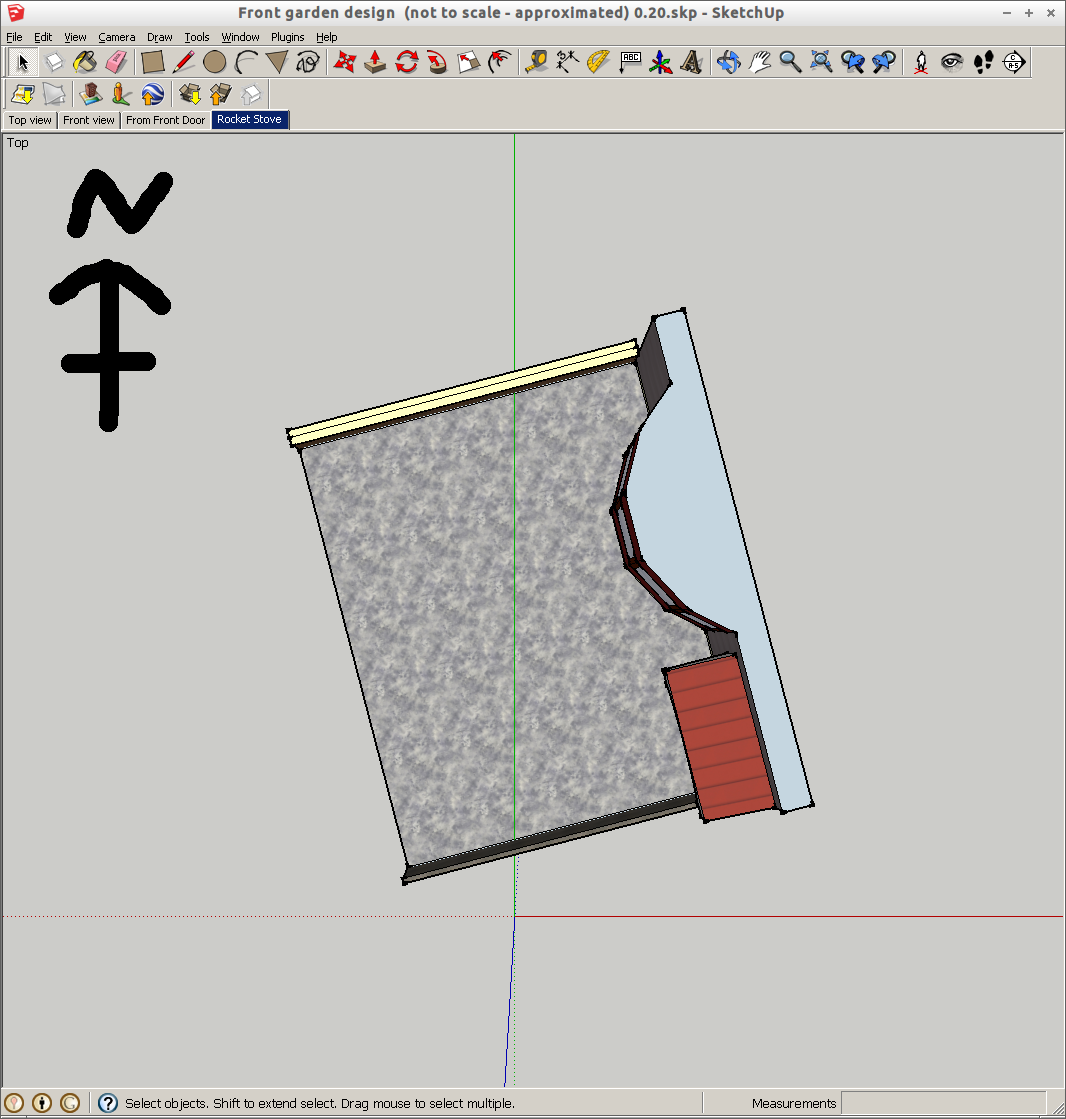
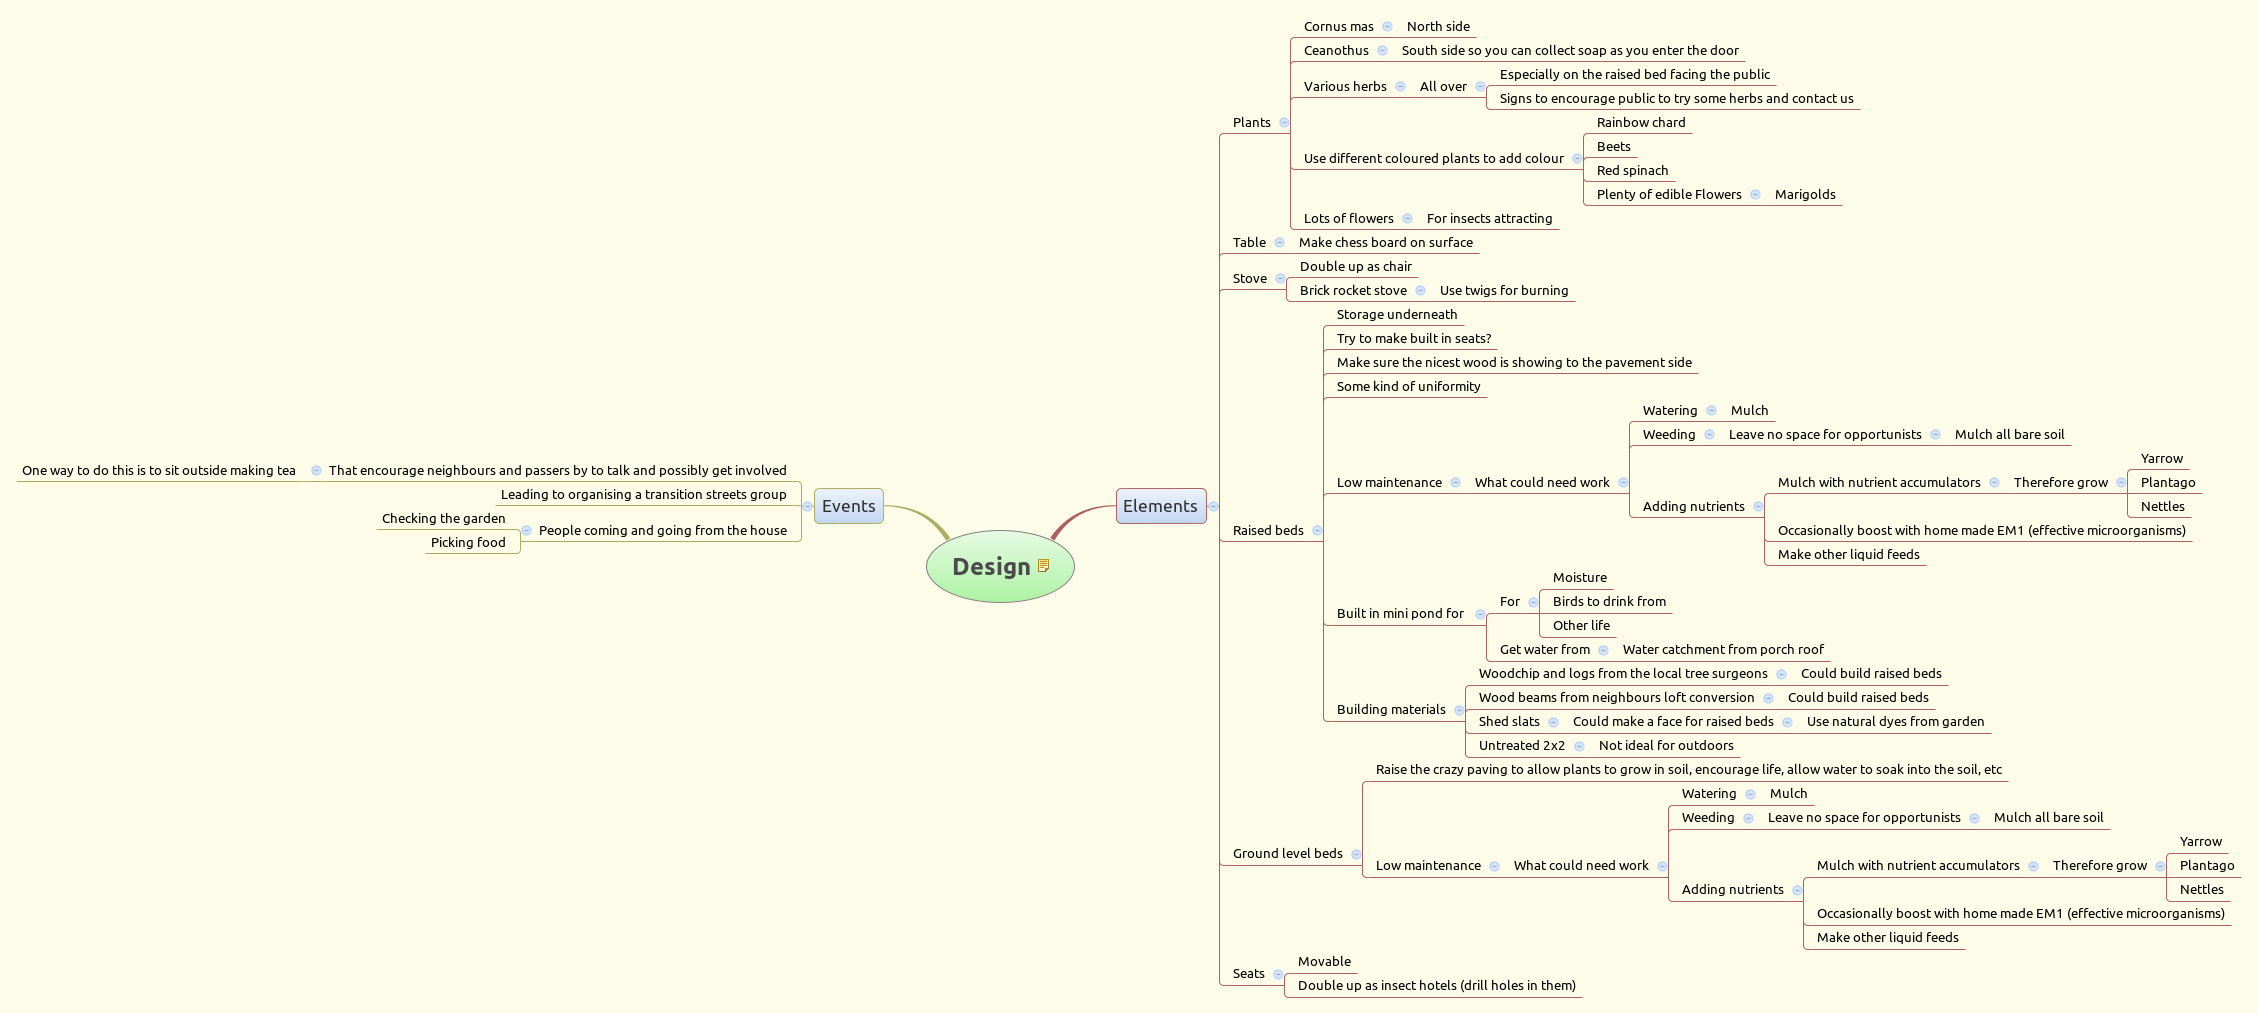
Design
The rough design as seen from the pavement
In the design you will see the taller tree (Cornus mas), which is placed at the back to prevent it blocking sunlight from the rest of the garden. It is also there because it does not need much looking after or harvesting. The ceanothus on the other hand will be picked every day, as this will be the main soap bush, hence this is placed as close to the fron door as possible. It is also incredibly beautiful and produces flowers for a long part of the season, so will be just lovely to look at as you come and go from the garden. The seats and table are placed in the middle, behind the raised bed to stop passers by just randomly sitting there. It is however welcoming enough to invite people to sit down when we are sitting there. The raised bed will have many different herbs, which will all be labelled. There will also be a note inviting people to help them selves to a small amount and to ask us if they want help to plant their own. At some point, I will plant on some seedlings and give them away to neighbours. I can also exchange seeds this way too. The rocket stove is slightly hidden so as not to attract too much attention from casual passers by.

The rough design as seen from the front door
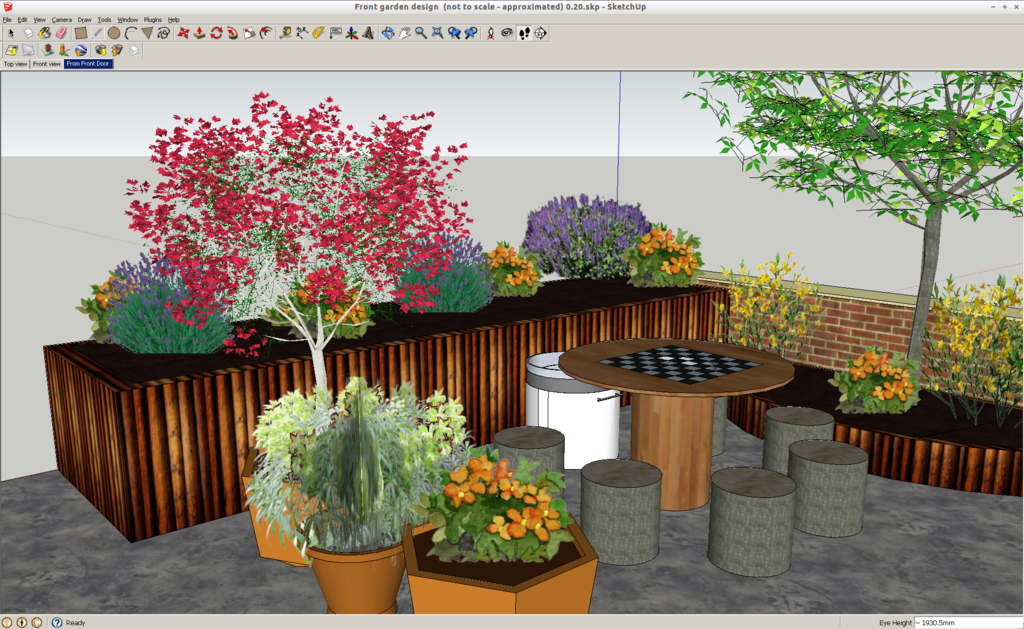
The rocket stove


The other elements viewed from above


The other elements viewed from in front


The sketchup designs does not show the full design (yet). The key things that are missing are how the water catchment and distribution system will work. I intend to make a gutter on the porch roof to catch the rain. I will fill one barrel on the same side as the door, and connect it to a second barrel on the north side. They will be connected fairly low down, so that they both fill at the same time. This way I can take water from wither side. While I realise the porch roof is small, I believe it will catch enough rain to make the low maintenance garden work. If not, I will adjust the system (either ask my neighbour if I can use his down pipe or change what I grow). Water from here can then be used to fill the small pond in the raised bed area or be directed to any other bed according to need.
Implementation
The plan is to implement this in summer 2014. I will start by taking up some of the crazy paving and making the two ground level beds. This will give me a chance to see what is underneath the paving so I can judge how much work will be necessary to bring it back to life. The next step will be the raised bed. This will take more time and materials than the floor level beds, hence making it after the ground level beds. This will give me time to collect the materials and time to grow enough cuttings, etc for the new bed. The guttering and water catchment will be next. Again this is a simple task and can be done any time. I have the materials already. The table and seats can be next. I have no idea about the materials I will use, but for sure it will be from some recycled material. Again the primary goal is to make it attractive, so I will be in no hurry and will wait for the right material to arrive. The rocket heater is a quick job. I can make one in the back garden in readiness for the raised bed to be made, which will give it some cover.
Maintenance
If designed well there should be very little maintenance. Once I have implemented it, I will write a run book with instructions on how to care for each plant, how, what and when to harvest plants, etcc.
Summary
Turning this grey and drab front garden into something special has been on my mind for a long time. So I am glad I found the time to design it. I imagine I will go through a few more design iterations and have some new ideas on how to make it happen, by the time I start. So watch this space.